Introduction and Key Insights
Buttermilk cake is a delightful treat that combines moistness with a rich flavor profile, making it a favorite among dessert lovers. This simple yet satisfying recipe can be enjoyed on its own or adorned with your favorite toppings. Whether you serve it at a family gathering or savor it as an afternoon snack, this cake is sure to impress. The beauty of buttermilk cake lies in its versatility—it can be dressed up for special occasions or kept simple for everyday enjoyment.
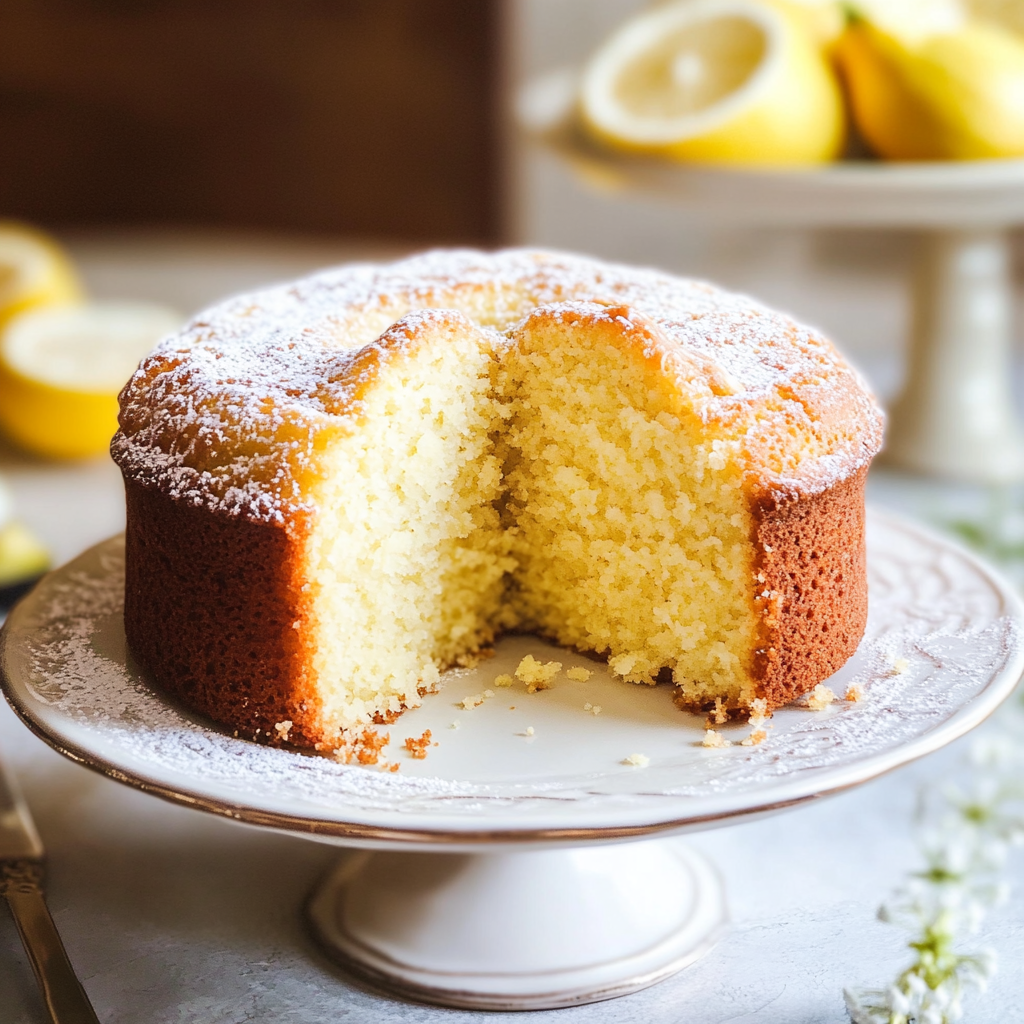
The use of buttermilk not only contributes to the cake’s tender texture but also adds a subtle tang that beautifully balances the sweetness. Additionally, the ingredients are easily accessible, allowing anyone to whip up this delicious dessert without much hassle. In this article, we will guide you through everything you need to know about baking the perfect buttermilk cake—from selecting the right ingredients to mastering the cooking process. We’ll also provide essential tips for serving and storing your creation so you can enjoy every last crumb.
Prepare yourself for a culinary journey that promises satisfaction in each bite of this extraordinary cake.
Ingredients Overview for Buttermilk Cake
All-Purpose Flour
Flour serves as the primary structure of your buttermilk cake. For this recipe, you’ll need 2 cups of all-purpose flour. It offers the right amount of gluten to create a light yet sturdy texture that holds up well during baking.
Granulated Sugar
Sugar sweetens your cake while also contributing to its overall moisture content. You will need 1 cup of granulated sugar for our recipe. This quantity ensures that your buttermilk cake has just the right level of sweetness without overpowering the other flavors.
Baking Powder
Baking powder acts as a leavening agent that helps your cake rise beautifully while remaining soft and fluffy. For this recipe, you’ll require 1 teaspoon of baking powder. This small addition makes all the difference in achieving that desired airy texture.
Baking Soda
In addition to baking powder, you’ll also need ½ teaspoon of baking soda. This ingredient works hand-in-hand with the acidity in the buttermilk to create carbon dioxide bubbles during mixing and baking, ensuring your cake rises evenly.
Salt
Salt enhances flavor and balances sweetness in baked goods. You will only need ½ teaspoon of salt for this recipe. Its presence will elevate the overall taste profile of your buttermilk cake without making it taste salty.
Eggs
Eggs are essential for binding ingredients together while adding moisture and richness to your batter. Use 2 large eggs at room temperature for optimal results; they contribute both structure and flavor.
Unsalted Butter
Butter adds richness and a lovely buttery flavor to your cake while keeping it moist. For our recipe, you’ll need ½ cup (1 stick) of unsalted butter at room temperature. Make sure it’s softened so it can blend smoothly into your batter.
Buttermilk
As the star ingredient in this recipe, buttermilk imparts a tangy flavor while ensuring a tender crumb in every slice. You will require ¾ cup of buttermilk for perfect moisture balance and flavor enhancement.

How to Prepare Buttermilk Cake
Step 1: Preheat Your Oven
Begin by preheating your oven to 350°F (175°C). This step is crucial as it allows your oven to reach the ideal temperature before you place your batter inside—ensuring even baking throughout.
Step 2: Prepare Your Baking Pan
While waiting for your oven to preheat, prepare your baking pan by greasing it with butter or cooking spray and then lightly dusting it with flour. This prevents sticking and makes removing the baked cake much easier later on.
Step 3: Mix Dry Ingredients
In a medium bowl, whisk together all-purpose flour, baking powder, baking soda, and salt until well combined. This ensures that each leavening agent is evenly distributed throughout the flour mixture—crucial for uniform rising during baking.
Step 4: Cream Butter and Sugar
In a large mixing bowl, cream together softened unsalted butter and granulated sugar using an electric mixer on medium speed until light and fluffy—about 3-5 minutes should suffice. This process incorporates air into the mixture which helps in achieving a lighter texture in your final product.
Step 5: Add Eggs
Add one egg at a time into the creamed mixture while mixing on low speed until fully incorporated after each addition; this prevents splashing while ensuring thorough blending along with incorporating additional air into the batter.
Step 6: Incorporate Dry Ingredients
Gradually add half of your dry ingredient mixture into the wet mixture while alternating with half of the buttermilk—beginning and ending with dry ingredients (dry-wet-dry). Mix on low speed until just combined; avoid overmixing which can lead to a dense final product.
Step 7: Pour Batter into Pan
Once all ingredients are combined seamlessly into a smooth batter without lumps remaining pour it into prepared pan spreading evenly using a spatula if necessary; gently tap against countertop surface releasing any trapped air bubbles within batter before placing into preheated oven.
Step 8: Bake Your Cake
Bake in preheated oven for approximately 25-30 minutes or until golden brown on top. A toothpick inserted should come out clean when done. Pay attention not too open door frequently during bake time since sudden temperature changes may affect end result negatively.
Step 9: Cool Down Your Cake
After removing from oven let cool within pan placed atop wire rack for about ten minutes then gently invert onto rack allowing complete cooling before frosting/serving—this will ensure better structural integrity preventing collapse during removal process.

Serving and Storing Tips
Serving Suggestions
This moist buttermilk cake can be served plain or adorned with various toppings such as whipped cream fresh fruits chocolate ganache. Consider serving slices alongside coffee tea making them perfect additions brunch gatherings. For special occasions feel free add festive decorations like sprinkles edible flowers creating eye-catching presentations sure impress guests.
Storing Leftovers
To store leftovers wrap cooled slices tightly using plastic wrap or aluminum foil preserve freshness ensure flavors remain intact. Alternatively place them inside airtight container store refrigerator up two-three days maintaining optimal taste quality however note texture may slightly change due refrigeration conditions.
By following these detailed instructions along with proper storage techniques you’ll be able enjoy delectable slices delightful homemade treat long after initial bake day satisfaction guaranteed each bite.
Mistakes to avoid
One common mistake when making Buttermilk Cake is using the wrong type of flour. All-purpose flour is typically recommended for this recipe, as it provides the perfect balance between structure and tenderness. However, using cake flour can lead to a cake that is too soft and crumbly, while bread flour may result in a dense texture. Always measure your flour correctly by spooning it into the measuring cup and leveling it off with a knife. This method prevents packing and ensures you use the right amount.
Another pitfall is neglecting to preheat your oven. Many bakers underestimate the importance of this step. If you place your cake batter in an oven that hasn’t reached the desired temperature, the cake will not rise properly. This can lead to uneven baking and undesirable results. Always take the time to preheat your oven for at least 15-20 minutes before you start baking.
Overmixing your batter is yet another mistake that can ruin your Buttermilk Cake. When you mix too vigorously, you incorporate too much air into the batter, which can lead to a tough texture instead of a light and fluffy one. Mix until just combined; small lumps are perfectly fine. Remember, a gentle hand ensures a tender crumb.
Lastly, be cautious when it comes to cooling your cake. It’s tempting to remove it from the pan immediately after baking, but doing so can cause it to break apart. Allow your cake to cool in the pan for about 10-15 minutes before transferring it to a wire rack. This helps maintain its structure and prevents unnecessary crumbling.

Tips and tricks
When preparing Buttermilk Cake, one effective tip is to use room-temperature ingredients. Ingredients like eggs and buttermilk should be at room temperature before mixing them into your batter. This leads to better emulsification and a smoother texture in the final product. If you’ve forgotten to take them out ahead of time, you can quickly warm eggs in a bowl of warm water or let buttermilk sit out for about 30 minutes.
Another valuable trick is to add flavor enhancements such as vanilla extract or citrus zest. These additions elevate the taste profile of your Buttermilk Cake significantly without complicating the process. A teaspoon of vanilla extract complements the tanginess of buttermilk beautifully, while lemon or orange zest adds a refreshing brightness.
For those looking for moistness in their cakes, consider incorporating sour cream or yogurt along with buttermilk. These dairy products not only add moisture but also create a rich flavor profile that enhances your cake’s overall texture. You can replace part of the buttermilk with an equal amount of sour cream or yogurt without altering other ingredient quantities.
Finally, don’t overlook proper storage methods after baking your Buttermilk Cake. To keep it fresh longer, wrap it tightly in plastic wrap once cooled completely or store it in an airtight container at room temperature for up to three days. For extended storage, consider freezing individual slices wrapped in plastic wrap followed by aluminum foil; this retains moisture and flavor exceptionally well.
Suggestions for Buttermilk Cake
To achieve the best results with your Buttermilk Cake, consider using high-quality ingredients as they directly impact flavor and texture. For example, invest in pure vanilla extract rather than imitation vanilla; this simple switch can enhance richness significantly. Freshly grated nutmeg or cinnamon are great spices that add complexity without overwhelming the classic taste.
Experimenting with different toppings can also elevate your Buttermilk Cake experience further. Consider drizzling a simple glaze made from powdered sugar and lemon juice on top once cooled fully; this adds sweetness while complementing its tangy undertones beautifully. Alternatively, whipped cream paired with seasonal fruits like berries creates an appealing contrast both visually and taste-wise.
If you’re feeling adventurous, think about adding nuts or chocolate chips into your batter before baking. Chopped walnuts or pecans provide delightful crunchiness alongside added flavor depth while mini chocolate chips melt deliciously throughout each slice—perfect if you’re craving something rich yet comforting.
Lastly, consider pairing your Buttermilk Cake with beverages like coffee or tea during serving occasions. The slight acidity from buttermilk harmonizes well with these drinks’ warm notes; this makes for an inviting dessert experience whether hosting friends or enjoying quality time with family.

FAQs
What makes Buttermilk Cake different from regular cake?
Buttermilk Cake stands out due to its use of buttermilk as one key ingredient contributing to its unique texture and flavor profile compared to traditional cakes made solely with milk or water. The acidity in buttermilk reacts with baking soda during mixing leading towards leavening effects while giving subtle tanginess that balances sweetness; thus creating an incredibly moist crumb ideal for various frosting options as well.
Can I make Buttermilk from scratch?
Yes. If you don’t have store-bought buttermilk handy when preparing your cake recipe don’t worry—you can easily make some at home by combining milk (whole milk works best) with an acid like vinegar or lemon juice. Simply measure one cup of milk then stir in either tablespoon into it; let sit for about five minutes until thickened slightly before using as substitute—this yields similar results.
How do I store leftover Buttermilk Cake?
To keep leftover slices fresh after enjoying initial servings ensure wrapping them tightly either using plastic wrap or placing them inside an airtight container—this helps prevent drying out while maintaining moisture levels within each slice. Store at room temperature for up 3 days unless refrigerated where they last longer yet should be consumed within one week.
Can I freeze my Buttermilk Cake?
Absolutely. Freezing is an excellent option if you want longer-term storage solutions without sacrificing quality. Allow fully cooled cakes/slices wrapped securely first within plastic wrap followed by aluminum foil—this protects against freezer burn effectively—then store accordingly within freezer bags labeled clearly via date noted upon them so tracking becomes easier later on.
What frosting pairs well with Buttermilk Cake?
The versatility associated alongside flavors found within buttermilk makes finding suitable frostings straightforward since options abound ranging from simple buttercream icings flavored lightly (e.g., vanilla) all way towards cream cheese varieties lending tangy notes themselves elevating overall taste experience even further if desired.
Is there an alternative for gluten-free options?
Certainly. If looking towards gluten-free alternatives while preparing delicious variations using similar recipes simply opt substitutes like almond flour coconut flour combined together achieving comparable textures/tastes found within traditional versions so everyone enjoys delightful experiences regardless dietary restrictions present ensuring no one misses out.
Conclusion
Baking Buttermilk Cake requires attention to detail and awareness of common pitfalls that could deter success along way—such understanding ensures delightful outcomes each time baked. By avoiding mistakes regarding ingredient choices such as flour types along with careful mixing techniques ensures tender results alongside flavors coming through beautifully every bite savored truly enhancing overall enjoyment experienced.
Implementing helpful tips including utilizing room-temperature items plus experimenting flavors via enhancements like citrus zest keeps things exciting while ensuring moistness retained across slices enjoyed later on—this guarantees satisfaction regardless occasion being celebrated. Furthermore recommendations regarding tasty toppings paired beverages amplify enjoyment factor ensuring memorable moments shared amongst loved ones gathered around table—truly what every baker desires achieving ultimately through artistry represented via their culinary creations crafted lovingly over time spent together celebrating life’s sweetest moments found nestled between layers created thoughtfully each time baked anew.
Print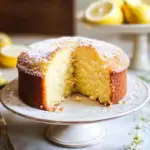
Buttermilk Cake
5 Stars 4 Stars 3 Stars 2 Stars 1 Star
No reviews
- Author: Clara Rosewood
- Total Time: 1 hour
- Yield: 8 servings 1x
- Diet: Vegetarian
Description
Buttermilk Cake is a soft and moist dessert with a delicate tang from the buttermilk. This cake is incredibly light and fluffy, making it the perfect treat for any occasion. It pairs wonderfully with whipped cream, fruit, or a simple dusting of powdered sugar.
Ingredients
For the Cake:
- 2 1/2 cups all-purpose flour
- 2 teaspoons baking powder
- 1/2 teaspoon baking soda
- 1/4 teaspoon salt
- 1/2 cup unsalted butter, softened
- 2 cups granulated sugar
- 3 large eggs
- 1 teaspoon vanilla extract
- 1 cup buttermilk
For the Frosting (Optional):
- 1/2 cup unsalted butter, softened
- 2 cups powdered sugar
- 1 teaspoon vanilla extract
- 2–3 tablespoons milk or buttermilk
Instructions
- Preheat the Oven:
- Preheat your oven to 350°F (175°C). Grease and flour two 9-inch round cake pans, or line them with parchment paper.
- Prepare the Dry Ingredients:
- In a medium bowl, whisk together the flour, baking powder, baking soda, and salt. Set aside.
- Cream Butter and Sugar:
- In a large bowl, beat the softened butter and granulated sugar together until light and fluffy, about 3 minutes.
- Add the Eggs and Vanilla:
- Add the eggs one at a time, beating well after each addition. Stir in the vanilla extract.
- Add the Buttermilk and Dry Ingredients:
- Gradually add the dry ingredients to the butter mixture, alternating with the buttermilk. Start and end with the dry ingredients, mixing until just combined.
- Bake the Cake:
- Divide the batter evenly between the prepared cake pans. Smooth the tops with a spatula.
- Bake for 25–30 minutes, or until a toothpick inserted into the center of the cake comes out clean.
- Cool the Cake:
- Let the cakes cool in the pans for 10 minutes before transferring them to a wire rack to cool completely.
- Prepare the Frosting (Optional):
- In a medium bowl, beat the softened butter until smooth. Gradually add powdered sugar and vanilla extract, mixing until smooth. Add milk or buttermilk a little at a time until the frosting reaches your desired consistency.
- Frost the Cake:
- Once the cakes are completely cooled, spread frosting on top of one layer, then place the second layer on top. Frost the top and sides of the entire cake.
- Serve:
- Slice and enjoy!
Notes
- You can make this cake in advance and store it at room temperature, covered, for up to 3 days.
- For a twist, add lemon zest or a teaspoon of cinnamon to the batter for added flavor.
- This cake is also great with fruit toppings like fresh berries or a drizzle of caramel sauce.
- Prep Time: 15 minutes
- Cook Time: 25–30 minutes
- Category: Dessert
- Method: Baking
- Cuisine: American

 Brown Sugar and Coconut Body Scrub Exfoliates

 Get The Product!