Introduction and Key Insights
The holiday season is the perfect time to gather around a table filled with delicious treats, and what better way to celebrate than with a Berry Merry Christmas Cake? This delightful cake combines seasonal berries with rich flavors that embody the spirit of Christmas. Whether you’re hosting a festive gathering or looking for the ideal dessert to bring to a family dinner, this cake will surely impress your guests.
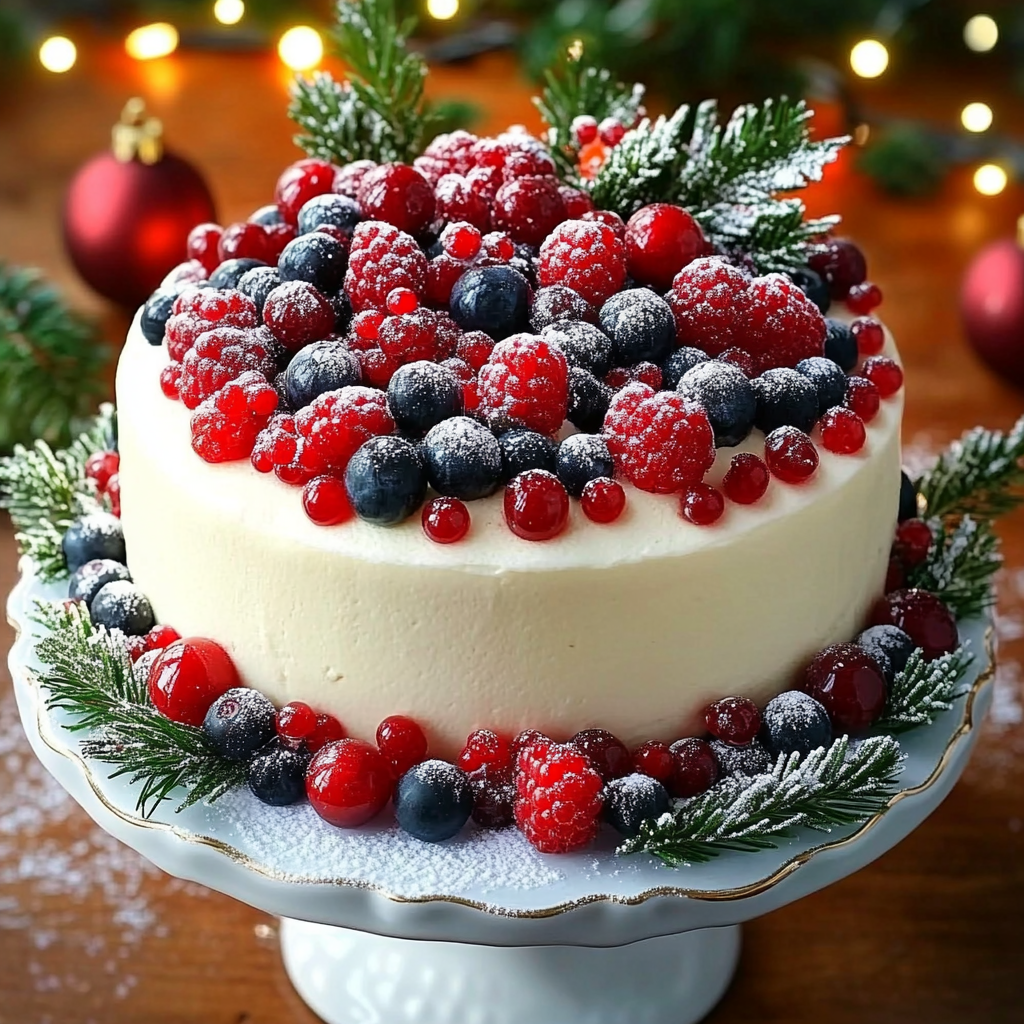
What makes the Berry Merry Christmas Cake special is its vibrant colors and inviting aromas that fill your kitchen while baking. The combination of fresh berries not only adds a burst of flavor but also creates an enchanting visual appeal that captures the essence of the holidays. Each slice offers a moist crumb and a sweet-tart taste that balances beautifully with creamy frosting.
In this recipe, you will find detailed instructions on how to create this stunning cake from scratch. We’ll cover everything from selecting the best ingredients to serving suggestions that will enhance your holiday experience. So, roll up your sleeves and prepare for some joy-filled baking as we dive into making the Berry Merry Christmas Cake.
Ingredients Overview for Berry Merry Christmas Cake
All-Purpose Flour
All-purpose flour serves as the backbone of our cake, providing structure and stability. For this recipe, you will need 2 cups of all-purpose flour. It’s essential to measure accurately; using too much flour can lead to a dense cake. Sifting the flour before adding it to your mixture helps aerate it and ensures there are no lumps.
Granulated Sugar
Sugar is not just for sweetness; it also affects the texture of your cake. You will need 1 cup of granulated sugar for this recipe. As it dissolves during mixing or baking, sugar helps retain moisture in the finished product. This results in a tender crumb that keeps your cake fresh longer.
Baking Powder
Baking powder acts as a leavening agent in our Berry Merry Christmas Cake. You’ll require 2 teaspoons of baking powder to help the cake rise beautifully while baking. It’s crucial to check the expiration date on your baking powder, as stale leavening agents can result in a flat cake.
Unsalted Butter
Using 1 cup of unsalted butter adds richness and flavor to our cake base. Remember to let it soften at room temperature before mixing; this helps incorporate air into the batter for a light texture. Unsalted butter allows you better control over the saltiness of your cake since we add salt separately.
Eggs
Eggs are vital for binding ingredients together while providing moisture. This recipe requires 3 large eggs at room temperature. Beaten into the mixture, they contribute structure and stability due to their proteins coagulating during baking.
Fresh Berries
Fresh berries are what make this cake truly merry. You’ll need about 2 cups mixed berries—such as raspberries, blueberries, and chopped strawberries—for vibrant flavor and color. Choose ripe berries for maximum sweetness; wash them gently under cold water before use.
Heavy Cream
Heavy cream will be used later in frosting preparation but is essential for creating a rich texture in both layers and topping. You will need approximately 1 cup of heavy cream whipped until stiff peaks form.
Vanilla Extract
Vanilla extract enhances all other flavors present in your cake batter. Use 1 teaspoon of pure vanilla extract for an aromatic touch that perfectly complements both berries and butter.

How to Prepare Berry Merry Christmas Cake
Step 1: Preheat Your Oven
Begin by preheating your oven to 350°F (175°C). Proper preheating ensures even cooking throughout your cake layers while preventing any sinking or uneven baking issues later on. While the oven warms up, line two 9-inch round cake pans with parchment paper or grease them thoroughly with butter or cooking spray.
Step 2: Mix Dry Ingredients
In one bowl, combine your dry ingredients—2 cups of all-purpose flour, 2 teaspoons of baking powder, and a pinch of salt (about half a teaspoon). Whisk these together until well blended; doing so helps evenly distribute leavening agents throughout your flour mixture.
Step 3: Cream Butter and Sugar
In another large mixing bowl, beat together 1 cup softened unsalted butter and 1 cup granulated sugar using an electric mixer on medium speed until creamy—about 3-4 minutes should suffice. Scrape down sides as needed; you want everything combined well without any lumps remaining.
Step 4: Add Eggs One at a Time
Once creamed together successfully, add in each egg one by one while mixing continuously on low speed after each addition until fully incorporated (roughly another minute). Finally pour in 1 teaspoon pure vanilla extract before continuing.
Step 5: Combine Wet and Dry Mixtures
Gradually add half of your dry mixture into this wet mixture while alternating with half (or all) heavy cream—starting & finishing with dry ingredients will create better blending. Mix gently but thoroughly just until no streaks remain visible—over-mixing can lead towards tough cakes due gluten development.
Step 6: Fold in Berries
Gently fold in those beautiful fresh berries you prepared earlier—this should keep them intact while ensuring they’re spread evenly throughout each layer. Pour batter equally between both prepared pans; smooth tops lightly if necessary before placing them into preheated oven.
Step 7: Bake
Allow cakes to bake undisturbed for about 25-30 minutes or until golden brown & toothpick comes out clean from center (keep an eye on things around mark.). Once done remove from oven & let cool inside pans set atop wire racks for about ten minutes before transferring cakes onto racks solely allowing cooling completely (roughly another hour).

Serving and Storing Tips
Serving Suggestions
When serving your Berry Merry Christmas Cake at festive gatherings or intimate dinners alike think about presentation. Slice chilled cakes into wedges & arrange them neatly upon decorative plates garnished with whole berries alongside whipped cream dollops if desired. Additionally sprinkling powdered sugar atop slices adds elegance without overpowering flavors—all contributing towards irresistible charm during celebrations.
Storage Guidelines
To keep leftovers fresher longer store any remaining slices inside an airtight container placed within refrigerator where they’ll last up till four days max. If freezing is preferred wrap individual pieces securely using plastic wrap then place inside freezer bags storing up six months safely preserving both taste & texture when thawed back out later use again whenever cravings strike unexpectedly.
By following these steps carefully not only will you create delightful memories but also enjoy scrumptious indulgence through every bite enjoyed amidst joyous occasions shared together year after year.
Mistakes to avoid
When baking the Berry Merry Christmas Cake, it’s important to be aware of common mistakes that can derail your efforts. One of the most frequent errors is not measuring your ingredients accurately. Baking is a science, and even slight deviations can affect the outcome. Always use a kitchen scale for dry ingredients like flour and sugar, and measure liquids with a liquid measuring cup. This ensures consistent results every time.
Another mistake is neglecting to preheat your oven. If you place the cake batter in an unheated oven, it can lead to uneven baking and poor texture. Preheating your oven allows the cake to rise properly from the start, creating a light and fluffy texture.
Overmixing is another pitfall to avoid. Once you combine wet and dry ingredients, mix just until incorporated. Overmixing can lead to a dense cake rather than the airy delight you want for your Berry Merry Christmas Cake.
Also, don’t forget about cooling time. If you attempt to frost or slice the cake while it’s still warm, the frosting may melt or the layers may crumble. Letting your cake cool completely on a wire rack ensures stability for decorating.
Lastly, ensure you use high-quality ingredients for the best flavor. Using stale or low-quality berries can diminish the taste of your festive cake. Fresh fruits not only enhance flavor but also add vibrant color that makes your Berry Merry Christmas Cake visually appealing.

Tips and tricks
To achieve a flawless Berry Merry Christmas Cake, consider these handy tips and tricks. Start by selecting seasonal berries like cranberries, blueberries, and raspberries for an authentic holiday flavor. These berries not only taste great but also complement each other beautifully in terms of color and texture.
When preparing your baking pan, line it with parchment paper in addition to greasing it. This prevents sticking and ensures easy removal of the cake once it’s baked. Additionally, using room temperature eggs and butter helps create an even batter that mixes easily.
Incorporate flavors thoughtfully by adding spices such as cinnamon or nutmeg into your batter for warmth that enhances the overall profile of your cake. A splash of vanilla extract can also elevate flavors significantly; however, balance is key—don’t overdo it.
For decoration, consider making a simple cream cheese frosting that pairs wonderfully with berries. This adds richness without overpowering their natural sweetness. Adding fresh berries on top right before serving not only looks stunning but also preserves their freshness.
Finally, don’t hesitate to customize. You can swap out some of the flour for almond flour or incorporate nuts for added texture if that’s your preference. Personal touches often make holiday recipes special and unique.
Suggestions for Berry Merry Christmas Cake
Choosing complementary flavors is essential when crafting your Berry Merry Christmas Cake. Pairing tart berries with sweet elements creates a delightful contrast; consider adding a layer of lemon curd between the cake layers to brighten up flavors significantly.
If you’re looking for additional texture in each bite, try mixing in some finely chopped nuts like walnuts or pecans into your batter or as part of the decoration on top of frosting. This provides both crunch and nutty flavor that enhances every slice.
Consider serving this cake with a side of whipped cream infused with peppermint extract during holiday gatherings for an extra festive touch. The coolness of whipped cream balances perfectly with rich frosting while adding another dimension to flavor profiles.
Don’t forget about presentation. Use edible decorations such as candied orange peel or sprigs of rosemary alongside fresh berries on top of your cake—these additions create an eye-catching display that will impress guests at any holiday celebration.
Lastly, if you’re planning ahead, remember that this cake freezes well. You can prepare it in advance and store it tightly wrapped in plastic wrap before freezing—just thaw overnight in the refrigerator before serving.

FAQs
How do I store my Berry Merry Christmas Cake?
Storing your Berry Merry Christmas Cake properly ensures it stays fresh longer. If you plan on enjoying it within two days, keep it covered at room temperature in an airtight container to maintain its moisture level. For longer storage, refrigerate it; just be sure to cover it well with plastic wrap or place it in an airtight container to prevent drying out. If you wish to freeze leftovers, wrap individual slices tightly in plastic wrap followed by aluminum foil before placing them in an airtight freezer bag—this protects against freezer burn effectively.
Can I use frozen berries instead of fresh ones?
Yes. Frozen berries are an excellent alternative when fresh options aren’t available during off-seasons or if you’re looking for convenience. Just remember to thaw them completely first—drain any excess liquid so they don’t add extra moisture into your batter which might affect baking results adversely.
How long will my Berry Merry Christmas Cake last?
If stored correctly at room temperature or in the refrigerator, your Berry Merry Christmas Cake will typically remain fresh for about three days without compromising quality too much after being baked. If frozen well (as mentioned above), expect it to last up until three months while still tasting delicious once thawed again.
Can I make this cake gluten-free?
Absolutely. To create a gluten-free version of the Berry Merry Christmas Cake, substitute all-purpose flour with gluten-free alternatives such as almond flour or coconut flour blends specifically made for baking purposes. Always check specific product instructions regarding measurements since these may vary significantly compared to regular flour ratios.
What frosting works best for this cake?
Cream cheese frosting pairs beautifully with berry cakes due its tangy flavor balancing sweetness effectively. You could also opt for whipped cream topped with powdered sugar depending on preference—the lightness enhances fruitiness without overwhelming flavors present within layers.
Is there a way to make this recipe vegan-friendly?
Making a vegan version involves substituting egg content effectively—using flaxseed meal mixed with water as an egg replacer works wonders. Also consider swapping out butter using plant-based margarine along with non-dairy milk options instead when required throughout preparation stages.
Conclusion
Baking a delightful Berry Merry Christmas Cake involves understanding both common mistakes to avoid and helpful tips that enhance its quality significantly while ensuring enjoyable experience at celebrations alike. From accurate ingredient measurements down through thoughtful flavor pairings including spices & creamy frostings—each element contributes towards achieving ultimate success when creating this festive treat.
By avoiding pitfalls such as overmixing or skipping preheating ovens paired alongside utilizing high-quality ingredients maximizes potential outcomes deliciously too. Remember presentation matters greatly too—adding garnishes elevates visual appeal impressively.
Whether indulging alone during cozy nights spent indoors celebrating holidays together amongst loved ones sharing slices bursting full-of-flavor ultimately brings warmth into hearts everywhere around season’s cheeriness felt through every bite savored happily together year after year ahead… Happy baking everyone.
Print
Delightful Berry Merry Christmas Cake Recipe
5 Stars 4 Stars 3 Stars 2 Stars 1 Star
No reviews
- Author: Clara Rosewood
- Total Time: 1 hour 30 minutes (including cooling)
- Yield: 10–12 servings 1x
- Diet: Vegetarian
Description
Berry Merry Christmas Cake is a festive and vibrant holiday dessert filled with fresh berries and topped with a light, whipped cream frosting. Perfect for the Christmas season, this cake combines the sweetness of berries with a soft, fluffy cake base, making it a stunning and delicious centerpiece for any holiday table.
Ingredients
For the Cake:
- 1 1/2 cups all-purpose flour
- 1 teaspoon baking powder
- 1/2 teaspoon baking soda
- 1/4 teaspoon salt
- 1/2 cup unsalted butter, softened
- 1 cup granulated sugar
- 3 large eggs
- 1 teaspoon vanilla extract
- 1/2 cup whole milk
- 1/4 cup sour cream
For the Whipped Cream Frosting:
- 2 cups heavy cream
- 1/4 cup powdered sugar
- 1 teaspoon vanilla extract
For the Berry Filling and Topping:
- 1 cup strawberries, hulled and sliced
- 1 cup blueberries
- 1 cup raspberries
- 1 tablespoon honey or maple syrup (optional)
- Fresh mint leaves for garnish (optional)
Instructions
- Prepare the Cake:
- Preheat the oven to 350°F (175°C). Grease and flour two 8-inch round cake pans.
- In a medium bowl, whisk together the flour, baking powder, baking soda, and salt.
- In a large bowl, cream together the softened butter and granulated sugar until light and fluffy. Add the eggs, one at a time, beating well after each addition. Stir in the vanilla extract.
- Gradually add the dry ingredients to the wet ingredients, alternating with the milk and sour cream, beginning and ending with the dry ingredients. Mix until just combined.
- Bake the Cake:
- Divide the batter evenly between the prepared cake pans and smooth the tops.
- Bake for 25–30 minutes, or until a toothpick inserted into the center comes out clean. Let the cakes cool in the pans for 10 minutes before transferring to a wire rack to cool completely.
- Prepare the Whipped Cream Frosting:
- In a chilled bowl, beat the heavy cream, powdered sugar, and vanilla extract until stiff peaks form. Be careful not to overbeat.
- Assemble the Cake:
- Once the cakes are completely cooled, place one layer on a serving plate. Spread a thin layer of whipped cream frosting over the top, then layer with a handful of fresh berries.
- Place the second cake layer on top and frost the entire cake with the remaining whipped cream.
- Decorate the top with more fresh berries and garnish with mint leaves if desired.
- Optional: Sweeten the Berries:
- In a small bowl, drizzle the berries with honey or maple syrup and toss gently to coat. This step is optional, but it adds a lovely sweetness to the berries.
- Chill and Serve:
- Refrigerate the cake for at least 30 minutes before serving to allow the frosting to set. Slice and enjoy!
Notes
- You can substitute the fresh berries with a mixed berry compote if fresh berries are not available.
- For a dairy-free option, substitute the heavy cream and sour cream with coconut cream and a dairy-free yogurt.
- Store the cake in the refrigerator for up to 3 days.
- This cake can be made a day ahead and stored in the fridge, allowing the flavors to meld.
- Prep Time: 20 minutes
- Cook Time: 30 minutes
- Category: Dessert, Cake
- Method: Baking
- Cuisine: American

 Brown Sugar and Coconut Body Scrub Exfoliates

 Get The Product!