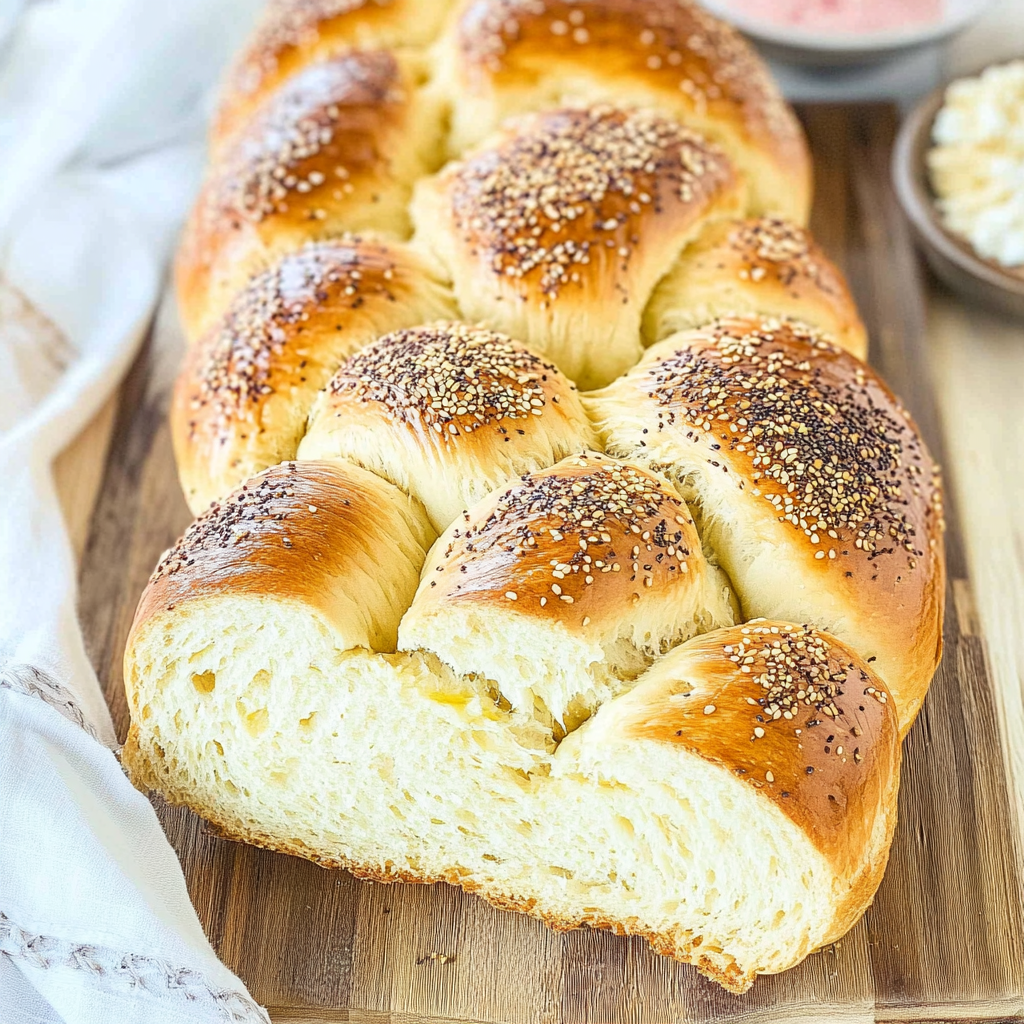
There’s just something magical about the golden crust of Challah bread, isn’t there? It’s like a warm hug from the oven, inviting you to take a slice and slather it with butter. The sweet aroma wafts through the kitchen, teasing your senses as you anticipate that first bite. The moment you sink your teeth into that soft, fluffy center, it’s like the clouds parted, and angels sang.
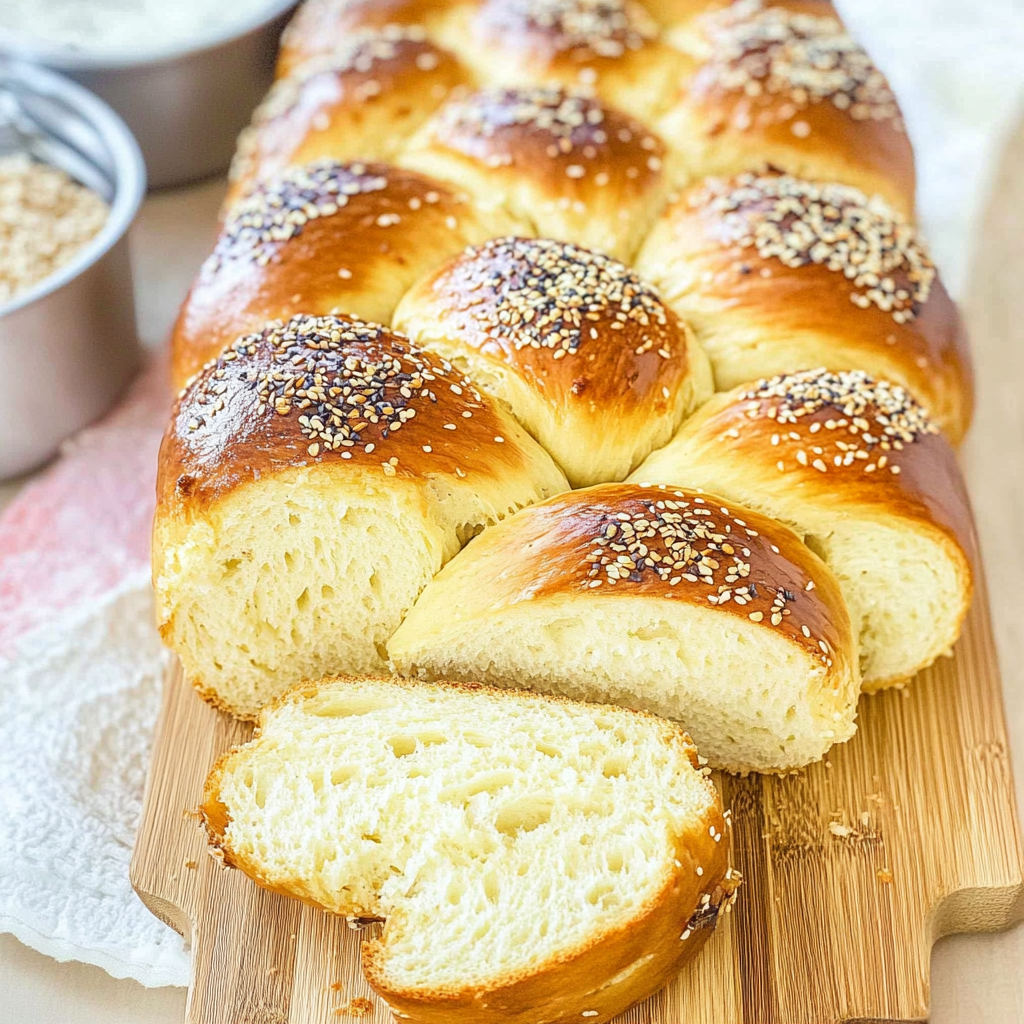
I remember the first time I made Challah bread; it was for a family gathering. As I pulled it out of the oven, my niece exclaimed, “Is that a cloud?” With each slice, laughter filled the room as we enjoyed this delicious creation. Whether you’re celebrating Shabbat or simply need a comfort food fix, this recipe will fill your home with warmth and joy.
Why You'll Love This Recipe
- This delightful Challah bread is easy to prepare even for beginners
- Its rich and slightly sweet flavor makes it perfect for any occasion
- The stunning braided design adds a touch of elegance to your table
- Versatile enough to be enjoyed plain or transformed into French toast the next day
I still vividly recall how my friends couldn’t stop raving about it at that family gathering; they polished off half a loaf before dinner even started.
Essential Ingredients
Here’s what you’ll need to make this delicious dish:
All-Purpose Flour: Use high-quality flour for better texture; bread flour works wonders, too.
Active Dry Yeast: Fresh yeast gives your dough that lovely rise; make sure it’s active for best results.
Warm Water: Just warm enough to activate the yeast—think cozy bath temperature.
Sugar: Adds sweetness and helps activate yeast; don’t skimp on this one.
Salt: Essential for flavor; balance is key in any baked good.
Eggs: Richness in the dough comes from these golden gems; they give color and moisture.
Vegetable Oil: Adds softness and keeps your bread fresh longer; olive oil can add an interesting flavor twist.
The full ingredients list, including measurements, is provided in the recipe card directly below.
How to Make Challah Bread
Get ready to embark on your baking adventure!
Activate the Yeast: In a small bowl, combine warm water with sugar and sprinkle in active dry yeast. Let it sit for about 5-10 minutes until foamy; this indicates that your yeast is alive and ready to work its magic.
Mix the Dough: In a large mixing bowl, whisk together flour and salt. Create a well in the center and add eggs and vegetable oil. Pour in your activated yeast mixture, then mix until combined. You’re looking for a shaggy dough that holds together.
Knead Away!: Transfer your dough onto a lightly floured surface and knead for about 8-10 minutes until smooth and elastic. This step is essential for developing gluten—your future self will thank you when biting into that fluffy bread!
First Rise Time!: Place the kneaded dough into a greased bowl—cover it with a damp cloth or plastic wrap—and let it rise in a warm spot until doubled in size (about 1-2 hours). The dough should feel light and airy when ready.
Braid Your Bread: After punching down the risen dough, divide it into three equal parts. Roll each part into long ropes about 12 inches long. Braid them together tightly but gently; make sure it looks pretty because we eat with our eyes first!
Bake It Up!: Preheat your oven to 350°F (175°C). Place your braided loaf on a baking sheet lined with parchment paper. Brush with egg wash (beaten egg) for that shiny finish. Bake for 30-35 minutes until golden brown on top and sounds hollow when tapped on bottom.
Now stand back while everyone marvels at your glorious creation!
Enjoying homemade Challah bread is not just about eating; it’s about sharing moments filled with laughter and love—like breaking bread together! So go ahead, grab those slices while they’re still warm!
You Must Know
- Baking Challah bread is not just about following a recipe; it’s a delightful experience
- The rich aroma wafting through your kitchen will make even your neighbor’s cat show up for a visit
- Plus, nothing beats the satisfaction of pulling fresh bread from the oven
Perfecting the Cooking Process
To craft perfect Challah bread, start by mixing your dough until smooth, let it rise, then braid and bake it until golden brown. Timing and temperature are key to getting that soft interior and crispy crust.
Add Your Touch
Feel free to experiment with flavors in your Challah bread. Adding dried fruits or spices can elevate the traditional recipe into something uniquely yours, giving each loaf a personal signature.
Storing & Reheating
Store your homemade Challah bread wrapped in plastic or in an airtight container at room temperature for up to three days. For longer storage, slice and freeze it, reheating slices in the toaster for fresh enjoyment.
Chef's Helpful Tips
- Keep your ingredients at room temperature for better yeast activation, leading to fluffier bread
- Ensure you knead thoroughly to develop gluten, which gives structure
- Finally, don’t rush the rising process; patience is key for that perfect texture!
Baking my first Challah was a memorable adventure! I remember my friends’ faces lighting up when they tried it; their compliments felt like winning a baking Oscar!
FAQ
What makes Challah bread different from other breads?
Challah bread is enriched with eggs and oil, giving it a rich flavor and soft texture.
Can I add fillings to my Challah?
Absolutely! Cream cheese, chocolate chips, or fruit preserves work wonderfully as fillings.
How do I know when my Challah is done baking?
Your Challah is ready when it sounds hollow when tapped on the bottom and is golden brown.
Challah Bread
- Total Time: 55 minutes
- Yield: Serves about 12 slices 1x
Description
Challah bread is a delightful, braided loaf that brings warmth and joy to any occasion. With its soft, fluffy texture and slightly sweet flavor, this homemade bread is perfect for celebrating Shabbat or simply enjoying as a comforting treat. The golden crust and beautiful braid make it a stunning centerpiece on your table. Whether enjoyed fresh or transformed into French toast the next day, this Challah recipe guarantees smiles all around.
Ingredients
- 4 cups all-purpose flour
- 1 packet (2 ¼ tsp) active dry yeast
- 1 cup warm water (110°F)
- ¼ cup sugar
- 1 tsp salt
- 3 large eggs
- ¼ cup vegetable oil
Instructions
- Activate the yeast: Combine warm water and sugar in a bowl; sprinkle yeast over top and let sit for 5-10 minutes until foamy.
- Mix the dough: In a large bowl, combine flour and salt. Create a well, add eggs and oil, pour in yeast mixture; stir until shaggy dough forms.
- Knead the dough: Transfer to a floured surface and knead for 8-10 minutes until smooth and elastic.
- First rise: Place dough in a greased bowl, cover with a damp cloth; let rise in a warm place for 1-2 hours until doubled.
- Braid the bread: Punch down risen dough, divide into three parts, roll into ropes, and braid tightly.
- Bake: Preheat oven to 350°F (175°C). Place braided loaf on parchment-lined baking sheet, brush with egg wash, and bake for 30-35 minutes until golden brown.
- Prep Time: 20 minutes
- Cook Time: 35 minutes
- Category: Bread
- Method: Baking
- Cuisine: Jewish
Nutrition
- Serving Size: 1 slice - approximately 45g
- Calories: 130
- Sugar: 3g
- Sodium: 120mg
- Fat: 4g
- Saturated Fat: 0.5g
- Unsaturated Fat: 3g
- Trans Fat: 0g
- Carbohydrates: 20g
- Fiber: 1g
- Protein: 4g
- Cholesterol: 40mg
 Mueller 10-in-1 Vegetable Chopper – Slice, Dice & Mince Effortlessly!